
 Bookmark
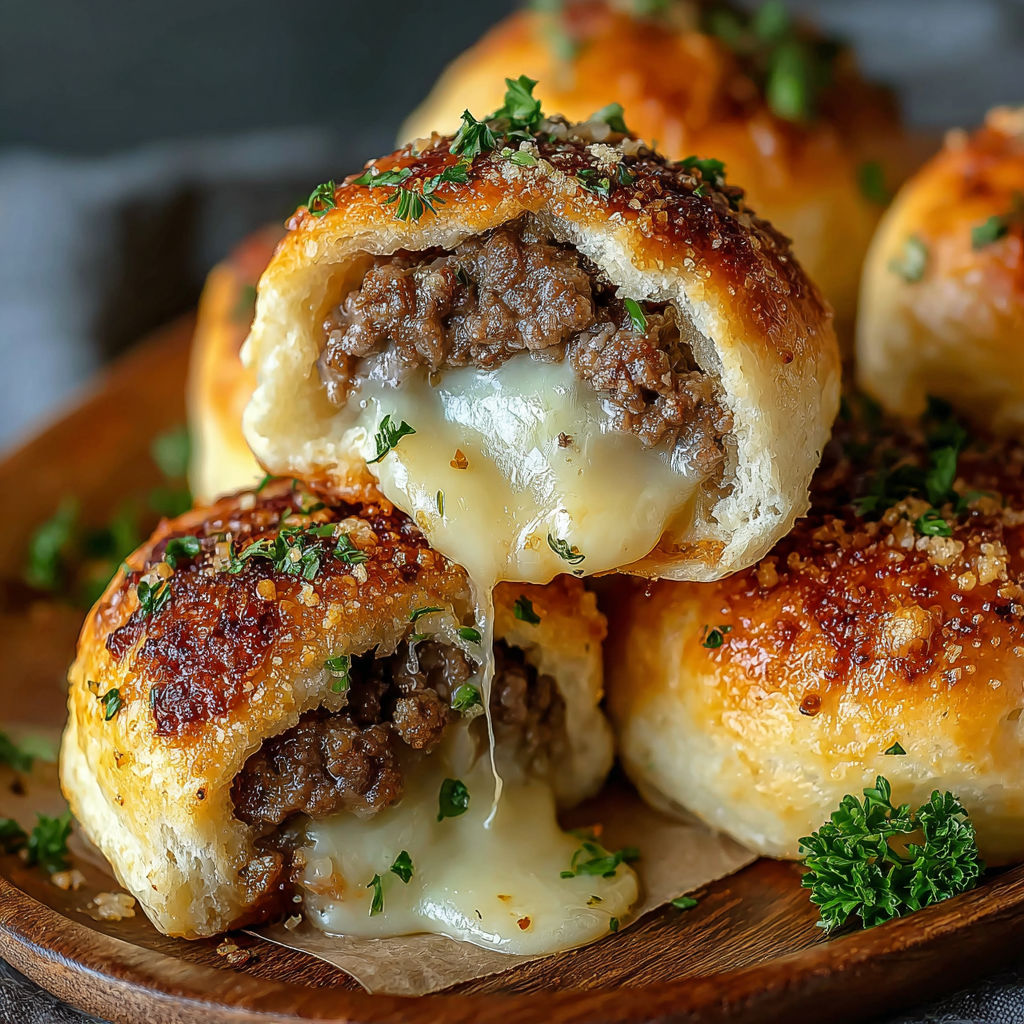
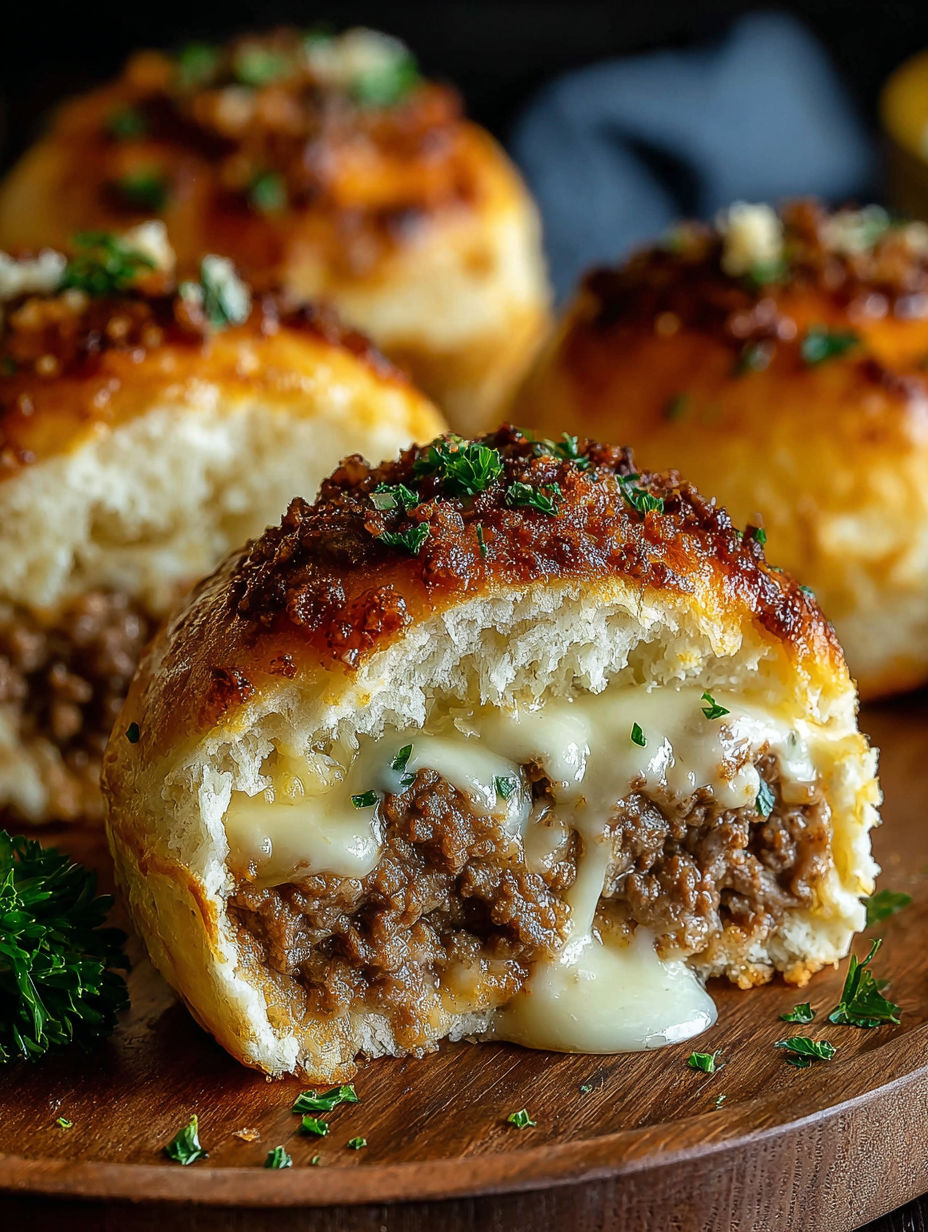
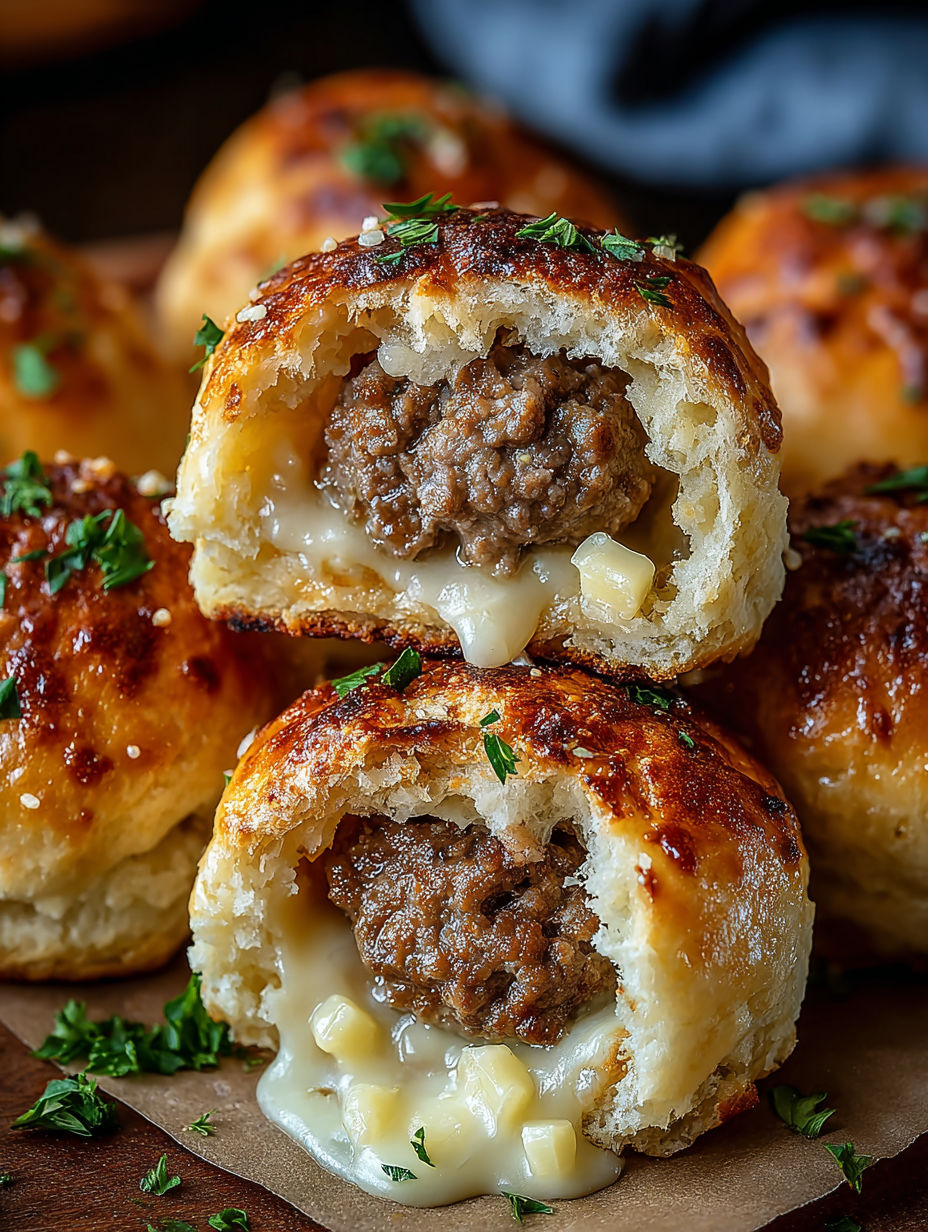
These Garlic Parmesan Cheeseburger Bombs bring the classic cheeseburger experience into a fun, handheld treat. Juicy seasoned ground beef mingles with sharp Parmesan and melty cheddar, then gets tucked inside flaky biscuit dough. Brushed with butter and baked to a golden crunch, each bite is bursting with rich cheeseburger flavors but in a neat package perfect for parties or busy family dinners. You can customize them easily with extras like smoky bacon or spicy jalapeños to suit all tastes.
I first made these for a football watch party and they disappeared before halftime. Now they are my goto appetizer whenever friends come over because everyone loves that crispy outside with oozy cheese inside
Ingredients
- Ground beef: 80/20 blend helps keep the filling juicy and flavorful
- Fresh garlic: minced finely so it distributes evenly creating a robust savory base
- Parmesan cheese: freshly grated melts smoothly and adds sharp depth to the flavor
- Cheddar cheese: cubed to create gooey pockets of melted cheese inside each bomb
- Biscuit dough: buttermilk based offers the right flaky texture and buttery taste
- Butter: brushed on top for that irresistible golden shine and added richness
- Fresh parsley: chopped finely adds a burst of color and a fresh herbaceous note
Instructions
- Prepare oven:
- Heat the oven to 375 degrees Fahrenheit and line a baking sheet with parchment paper to make cleanup a breeze and prevent sticking.
- Cook beef mixture:
- In a medium skillet over medium heat, add the ground beef and minced garlic. Break the beef into small pieces and cook thoroughly until no pink remains about 5 to 7 minutes. Drain excess fat carefully to avoid sogginess.
- Add cheeses:
- While the beef is still hot, stir in the grated Parmesan and cubed cheddar cheese so they begin to melt evenly. The residual heat helps bind the filling into a rich cheesy mixture.
- Assemble bombs:
- Separate the biscuit dough into individual pieces. Flatten each piece into a four inch circle using your hands or a rolling pin. Place about two tablespoons of the warm cheese and beef mixture in the center. Carefully fold the edges up and pinch firmly to seal all the filling inside. Gently roll between your palms to smooth and round out the seams.
- Bake:
- Arrange the sealed bombs seam side down on the prepared baking sheet spacing them about two inches apart for even baking. Brush each generously with melted butter to ensure a golden crisp crust. Bake for 12 to 15 minutes until deep golden brown and cooked through.
- Finish and serve:
- Allow the bombs to rest on the pan for five minutes so they set up and are easier to handle. Sprinkle with chopped fresh parsley and serve warm alongside your favorite dipping sauces like ranch or spicy mayo.
I learned from my grandmother that cubing cheddar cheese instead of shredding it creates those perfect cheese pulls that make every bite so satisfying
Storage Tips
Keep any cooled leftovers stored in an airtight container in the refrigerator for up to three days. To reheat, place them in a 350 degree oven for about five minutes to bring back their crisp exterior. They also freeze well when baked, lasting up to two months just thaw and reheat before serving.
Ingredient Substitutions
Ground turkey is a lean alternative to beef add a tablespoon of olive oil to keep the filling moist. For a gluten free option, swap the biscuit dough with your favorite gluten free version. Plant based ground meat and vegan cheeses work beautifully if you want to make a vegan friendly batch.
Serving Suggestions
Serve these cheese bombs with a variety of dipping sauces such as ranch, marinara, or a spicy mayo to enhance flavor. Pair them with crispy veggie sticks like carrots and celery or crispy potato wedges for a satisfying and complete meal.
These Garlic Parmesan Cheeseburger Bombs are a crowd favorite and perfect for parties or quick family dinners. They reheat well and freeze nicely for make ahead convenience.
Common Questions About the Recipe
- → Can I use pre-shredded cheese instead of cubed?
Freshly cubed cheddar melts more evenly and creates better cheese pulls than pre-shredded, which may contain anti-caking agents.
- → How do I prevent the bottoms from getting soggy?
Drain cooked beef thoroughly and bake bombs on a parchment-lined tray with space between each for even air circulation and crisping.
- → What's the best way to seal the dough properly?
Press edges firmly by hand, pinch tightly, and optionally moisten dough edges with water to help them stick and prevent leaks during baking.
- → Can I make these with ground turkey instead?
Yes, ground turkey works well. Add a tablespoon of olive oil for moisture and enhance flavor with extra garlic or herbs.
- → How long do leftovers stay fresh?
Store cooled pieces in an airtight container for up to 3 days. Reheat in a 350°F oven for 5–7 minutes. Freeze cooked bombs for up to 2 months.